Showing posts with label Lanscaping. Show all posts

Tuesday, October 30, 2012

HOME MAINTENANCE: 12 steps to winterize your home


The leaves are turning, the mornings are getting chilly, and winter isn't too far away. It's time once again for my annual checklist of important things that I recommend you do to get your home ready for the coming change of seasons.
On the inside
__ Check smoke detectors: Change your smoke detector batteries, and check for proper operation. Also, check the date on the bottom of the smoke detector. Smoke detectors have a life span, and if yours is more than 10 years old, it may not work properly in a fire, so replace it with a new one. Also, make sure you have a smoke detector at each sleeping room, and one centrally located on each level of the home.
__ Install a carbon monoxide detector: If you have a furnace, fireplace, water heater, or other appliance that's fueled by propane or natural gas, or if you have an attached garage, install a carbon monoxide detector. They just plug in, and you can get them inexpensively from most home centers and other retailers. If your existing carbon monoxide detector is more than 5 years old, replace it with a new one.
___ Check gas appliances: Speaking of gas appliances, consider having your utility company or heating contractor inspect flues, fittings, and other components of your natural gas or propane appliance and heating systems for potential problems.
___ Change furnace filters: Always put in new furnace filters in the fall. It's a simple and inexpensive way to add to your home's efficiency and your family's comfort.
___ Check and seal heating ducts: Crawl a little, save a lot. Check the ducts in your attic, basement, and crawl space for gaps between ducts and fittings, and seal them with a quality metallic tape, not regular duct tape, which doesn't last. Also, check to be sure that all of the ducts are off the ground and adequately supported.
___ Check insulation levels: Increased insulation can make a huge difference in both your comfort and your heating bills, so don't put off having your insulation levels inspected. Call your local utility company or building department to learn what levels are optimum for your area. Check the attic, underfloor, kneewalls, skylight shafts and ductwork. Upgrade underinsulated areas as needed, either as a do-it-yourself project (home centers and hardware stores have all the supplies you need) or with the help of a licensed insulation contractor.
On the outside
___ Check the roof: A roof that leaks not only has the potential to cause significant structural damage, it also wets insulation, which causes a drop in the insulation's ability to resist heat loss. Examine roofing shingles and flashings, and repair or replace them as needed. It's much easier and safer to take care of these problems now than during winter's ice and rain.
___ Seal masonry surfaces: Apply a sealer to concrete driveways and walkways, brick patios and other exterior masonry. Masonry sealers prevent water from penetrating into cracks and crevices where it can freeze and cause serious damage. You can find sealers at home centers, paint stores and masonry supply retailers. Apply with a brush, roller or sprayer.
___ Check weatherstripping: Gaps around doors and windows waste expensive heated air and create chilling interior drafts. Check and replace or adjust weatherstripping and door sills to create an airtight seal. Everything you need can be found at home centers, hardware stores and many other retailers.
___ Handle yard chores: Many plants require pruning this time of year, and lawns should be

Sunday, October 14, 2012

HOME MAINTENANCE: Reduce the risk of tree damage to your home

(Money Magazine) -- Does the severe weather of the past several years have you looking up at your trees in fear? It's an understandable concern. A big storm could destroy the plants' majesty in a flash -- and send a quarter-ton branch crashing down onto your roof.

Still, before you preemptively chip a favorite tree into mulch, consider this: It may be contributing 8% to 10% to your home's value, according to Scott Cullen of the Council of Tree and Landscape Appraisers.

Here's how to keep your leafy assets from becoming a liability.

Schedule regular upkeep
Have your trees inspected every five years or so -- a free service offered by tree-care companies. An arborist will look for branches that are weak or hanging within 10 feet of a building, and send workers to remove them.

If necessary, they'll also buttress the tree against high winds by cabling limbs together. All this work costs about $200 to $400 a tree and is typically needed only once a decade.

In many cases the tree will more than cover the cost of its maintenance over a few years; a big shade tree will knock nearly $70 off annual air conditioning bills, says David Nowak of the U.S. Forest Service, and a large evergreen that blocks winter winds will reduce heating costs by around $60 a year.

Get removal right
When a tree becomes diseased or dangerously overgrown given its proximity to a house, your arborist will recommend taking it down.

Removing a substantial tree could cost $2,000 to $5,000, depending on its size and whether it is accessible by truck or requires climbing -- and what's underneath that the crew must protect.

You can have the stump ground down to just below grass or mulch height for $50 to $200

Monday, August 13, 2012

HOME DESIGN: 5 Porch Pick-Me-Ups Under $500

Sprucing up your porch is more than a cosmetic upgrade — it’ll boost your curb appeal and help preserve the value of your home. As a bonus, you’ll even get some neighborhood bragging rights. Here are five simple porch pick-me-ups, each costing less than $500.


1. Adding architectural pizzazz
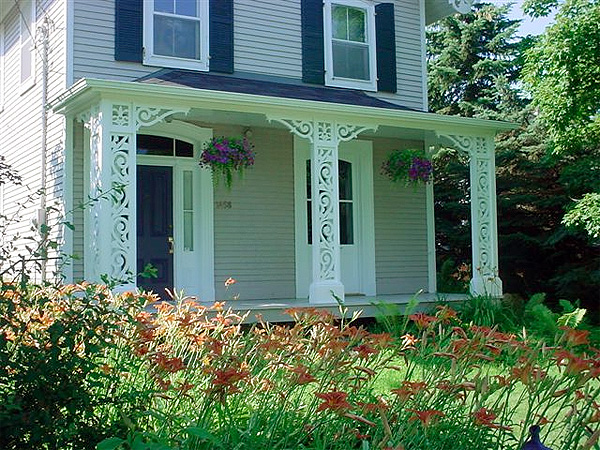
Sweeten your porch’s appearance with a wide variety of architectural trim pieces in weather-resistant wood or low-maintenance synthetics (PVC or polyurethane). They’re readily available at home improvement centers.


Most porch trim pieces install with nails or screws and require basic tools and moderate do-it-yourself skills. Or, hire a handyman for a few hours at $30-$60 an hour.


Add decorative brackets (starting at $20 each) where support posts meet the ceiling.
Span the space above porch stairs with a fancy fretwork spandrel ($200 for 6 feet).
Shapely corbels ($30 and up) lend charm under the eaves.


2. Painting the floor
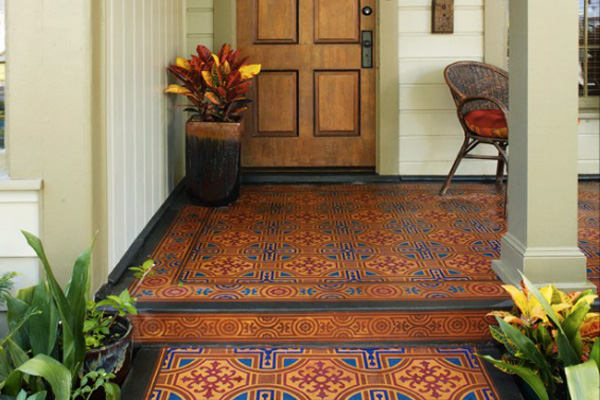
You’re walking on sunshine when you splash color on a porch floor. Use good-quality exterior paint made for porch floors ($30-$45 per gallon) and follow the manufacturer’s guidelines for prepping the surface so the paint won’t peel.


If the old paint dates prior to 1978, find out if the paint is lead-based. If necessary, remove lead paint.


Once the basecoat dries, you can add a painted design, such as a faux rug, using stencils. Or outline your motif with quick-release painter’s tape to ensure crisp edges.


3. Fanning a breeze


Stir up your own cooling breezes by adding a ceiling fan to your porch. Be sure to select a ceiling fan model designed for outdoor use ($75-$250).


Wiring a fan is a task you can do yourself in less than an hour if there’s an existing electrical box and you have the right electrical tools. Or, hire an electrician ($75-$200) to wire the fan.


4. Creating privacy


If your exposed porch leaves you feeling like a goldfish in a bowl, add home privacy using one or more of these makeover strategies:


Louvered shutters: Tall louvered panels, or shutters, filter light while allowing breezes to blow freely across your porch. Select shutters in wood, vinyl, or PVC; prices start at about $50 for a 12-by-64-inch shutter.


Install one or more shutters floor-to-ceiling or just above the rail to create a private spot on the porch. You’ll need an afternoon to install shutters, typically by securing wood cleats to the floor and fascia and fastening the shutters to the cleats with screws.


Outdoor fabric: Add a little romance, color, and pattern to your porch with fabric panels that draw closed for privacy. Weather-resistant curtain panels with grommet tops come in a variety

Sunday, August 12, 2012

LANDSCAPING: Keeping Your Patio More Private


One of the most relaxing and entertaining places in the home is the patio. Despite the fact that it’s outdoors, it can be an extension of your living space and a great place for dining with friends and family, lounging on a warm afternoon, or even hosting intimate parties with guests. In order to make it feel like a part of your home, it is important to create some privacy.
Keeping your patio private doesn’t have to involve large costs or renovations.  In fact, you can make use of what you already have rather than spending money on new items.
To help you keep your patio more private, here are a few ideas:
  • Plan a good spot for your patio. If you don’t have a patio yet and are planning to construct one, choose a spot where you can be concealed from neighbors. You may even find that you can use one side of the house to help conceal the area.
  • Plant flowers and greenery around your patio. This can be done by planting plants in pots or creating flower bed border. Or, you can simply move potted plants from other areas of your yard, so you don’t have to spend anything.
  • Add a pergola to your patio. Adding a roof will not only create privacy, but it will also provide more protection from extreme weather conditions, thus enabling you to enjoy it whenever you’d like. A pergola is a roofing option that adds elegance to your patio, and its classic appearance creates a cozy feel. However, if a pergola is too large of an investment for you right now, there are many other roofing options available.
  • Screen in your patio. There are three benefits of using a screen on your patio. First, it protects your patio from complete exposure to the outside. Second, despite being concealed, you still have a view of what is happening outside. Third, the screen helps keep out pesty insects, so you can enjoy your relaxation and meals in peace.
  • Install a fence. Place a fence or elevated border around your patio, so you can have a little privacy when eating breakfast or having a romantic dinner with your spouse. You can even

Friday, July 20, 2012

VIDEO: GARDENING, Gardening on top of Skyscrapers - Profiles in Design video

Sunday, June 24, 2012

OUTDOOR SPACE: Use of outside living areas growing in priority, complexity


As Americans try to maximize the space of their existing homes, they're increasingly looking outside to create new, rejuvenating places.
"More people are realizing that home begins when you set foot on your property, not just when you enter your front door," says garden designer Julie Moir Messervy, author of Home Outside: Creating the Landscape You Love (Taunton Press). "You can think of your outside as an extension of the inside."
An outdoor living/grilling area ranked as the third-highest priority space, after a separate laundry room and additional closets/storage, in a recent survey of 4,000 readers by Better Homes and Gardens magazine.
Clients see the outdoors as another room of their home, says Josh Baker of BOWA, a high-end remodeling firm in the Washington, D.C., area. He says he does "a lot of pools and other outdoor areas" to create a resort feel.
Messervy says homeowners want not only an "outside away room" to relax and entertain but also — in a new push toward "homesteading" — a spot to raise vegetables and livestock.
"People are keeping chickens even in Boston and Cambridge (Mass.), where many of our projects are," and others are keeping bees on flat roofs, Messervy says. "The definition of curb appeal has changed."
"Our editors predict an even bigger boom in home food gardens," Better Homes and Gardens says in its overview of 2012 garden trends. Many homeowners have limited space, so it expects more will grow food on rooftops and vertical lattices, or plant

Friday, June 22, 2012

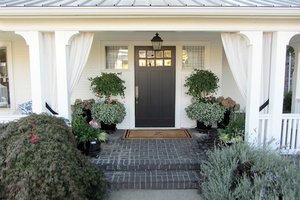
SELLING YOUR HOME: Porch Perfection: Welcomes Buyers Instantly


When the weather turns warmer, front porches across the country are put to use again. However, not all porches or front entryways are put to "good" use. Sometimes over the cold winter months they've taken a beating and are badly in need of repair. Other times they're used as storage for overflow from the garage, basement, or house and that is not a welcoming sight for buyers.

So, it simply makes sense that after a long winter or a period of non-use, front porches might need some maintenance. This doesn't have to be the kind of work that takes weeks to do nor does it have to be extremely costly.In real estate, we talk about the importance of a few key elements to help sell your home: location, pricing, and curb appeal. These are some of the highest influential factors that buyers consider. The reasons are obvious. Location is vital to most buyers, pricing is critical (especially in today's marketplace), and curb appeal gets buyers off the street and inside to view your home.

Creating and maintaining porch perfection is about the little things that you do. In fact, some simple repairs, replacements, and re-arranging can brighten up and refresh a worn- out porch.
Start by looking at your porch with a critical eye. If you have been storing items on your porch that should have a home elsewhere, move them now. If you have old carpets, beat up or discolored mats, toss them out and replace them. Look at the lighting on your porch. Is it just one tiny bulb? Perhaps an inexpensive lighting system would brighten the porch, creating a more enticing and safer entryway.

Examine the hardware. Are the door handles corroded? Are they hard to turn to open the door? Think of it this way, if the door hardware looks worn and the doors are banged up, the impression is that this home is not well maintained on the outside and the inside. Some buyers won't go any further. If the home looks messy from the outside, all they will see is the front of your door. See your home the way you would if you were seeing it for the first time, just as the buyers are.
Add some appealing decor. There are a couple of rules that apply when it comes to staging an

Thursday, April 12, 2012

GARDENING: 7 Killer Ways to Get Rid of Weeds

Here are 7 ways to murder weeds with household items. You’ll save money and show no mercy to your garden’s uninvited guests.
Nothing ruins your garden or yard like weeds, those uninvited guests that rob your plants of space and nutrients. So murder those weeds most foul, but without harmful chemicals that can do you in, too. 


Here are 7 ways to kill weeds with weapons you already have around your house. 


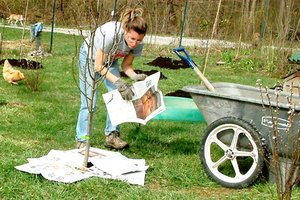
1. Newspaper: A carpet of newspaper, which blocks sunlight and oxygen from reaching the soil, will smother weeds already sprouted and prevent new ones from growing. Throw down newspaper in 10-sheet layers, wet to hold it down, and cover with an inch or two of mulch. If weeds begin to grow in the mulch, add more layers, making a mulch-newspaper lasagna, which eventually will decompose and nourish the soil.


2. Old shower curtains and carpet samples: Spreading these useless items in garden paths or between rows will keeps weeds from ever showing their unwanted heads. Cover with mulch. 


3. Corn gluten meal: This corn by-product stops seeds from growing into weeds. Since the meal will prevent germination, spread it around established plants, and after seedlings and transplants have taken hold in the soil. After harvest, spread the meal to prevent late-season weeds. 


4. Vinegar: The acetic acid in 5% vinegar is a desiccant that sucks the life out of plant leaves. It’s most destructive to young plants with immature roots, though it just rolls off weeds with waxy leaves, like pennywort or thistle. Make sure you cover desirables before spraying, because vinegar is an equal opportunity killer. Keep your spray on-target by removing the bottom from a 2-liter plastic soda bottle, and placing it over the weed. Spray vinegar into the mouth of the bottle, which will keep it from splattering on your vegetables. 


5. Vodka: Don’t know if vodka makes weeds fall down dead or drunk, but 1 ounce mixed with 2 cups of water and a couple of drops of dish soap will dry out weeds that live in the sun. Doesn’t

Friday, April 6, 2012

LANDSCAPING: Add A Living Privacy Screen to Your Small Home

A living privacy screen around your small home’s yard does triple-duty: It promotes privacy, security, and beauty. 


Here’s how: 
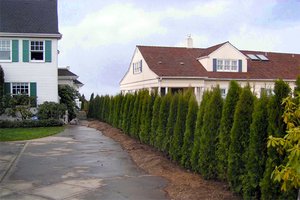
Block neighbors’ view from their second-story windows: Opt for mature, tall evergreens for year-round privacy. Plant tall, upright trees: American holly, Leyland cypress, cedar, pine (note size and circumference of the tree at maturity and choose accordingly). 


Block street views: Use shorter, thicker shrubs and hedges. Plant fast-growing shrubs: Red and yellow twig dogwood, American hazelnut, forsythia, Chinese privet. For security: Thorny hedges are dense, and the “ouch” factor discourages intrusion (you’ll want to consider these carefully if you have small children). Plant: Spanish bayonet (yucca), roses, flying dragon (poncirus), firethorn (pyracantha). “Oohs” and “aahs”: Combine ornamental trees, hedges, and trellises of flowering vines for a living privacy screen of year-round beauty. 


Ornamental hedges: Burning bush, purple lilac, tri-color willow. Ornamental trees: dogwood, Japanese maple, smoke tree. Small, confined areas: Tall grasses and bamboo work well to screen patios and garden sitting spots. 


Tall ornamental grasses: plume grass (Erianthus ravennae), maiden grass. Get in the zone Where you live makes a big difference in what you plant. The U.S. Department of Agriculture plant zone will help you decide. Climate and soil conditions are key. If you’re unsure of local conditions, hire a landscape architect or landscape designer to help develop a plan, or ask your state cooperative extension service for advice. 


How much will it cost? Traditional fencing for an 70-by-90-foot lot could run $3,000 to

Friday, January 20, 2012

WINTER GARDEN: Feeding Birds in Winter: To Stop or Not to Stop?

Heading out the door for a midwinter getaway, you congratulate yourself on your laudable stewardship of all the lives that depend on you--the dog is at the kennel, the goldfish is with a neighbor and a friend will come over to water your plants. But wait a minute! Your birdfeeders are already half empty, and you haven't even left the driveway. What will happen to those cute little chickadees when they fly in for black-oil sunflower seed but find nary a crumb?
Wild birds are resourceful, gleaning most of their food from the natural habitat; except in extreme or unusual circumstances, they manage to find enough to eat to survive. But birds that have become used to supplemental feeding may suffer when that food supply is suddenly missing, especially in winter. Experts offer a variety of tips and insights:
Keep feeders full when winter is toughest. Birdfeeders are most attractive to birds in winter, when natural food supplies are least available. Seed eaters such as finches, sparrows, titmice and chickadees may flock to feeders--in higher numbers than natural food sources alone in the immediate area could support. Seeds that are merely a welcome supplement under normal winter conditions may suddenly become vital in the space of one fierce ice storm or blizzard.
In general, it's more important to keep feeders going in the winter, especially during cold weather, say Donald and Lillian Stokes, residents of Massachusetts and authors of more than a score of nature guides.
"Chickadees have a fixed territory they stay in during the winter," Lillian says. "If they have come to depend on your food source, it's harder on them when it is removed during cold weather."
Feeders aren't birds' only source of food. "The real problems occur when an ice storm covers all the twigs and branches where they usually get insect larva and seeds. Then they really could use the supplemental feeder. Studies have shown that chickadees and their like fare better in winter if they have access to supplemental food at feeders."
Put up large-capacity feeders if necessary. The best suggestion is to find someone to replenish the feeders. "We usually have some large feeders that we use when we are on vacation," she says. "They hold a lot of seed and we have someone come once or twice a week to fill them and also check if there is a bad storm. If you have close neighbors that run reliable feeding stations and your birds could go next door if they needed to, then maybe they wouldn't be as affected if you stopped feeding."
Encourage neighborhood birdfeeding. Florida isn't a landscape that commonly comes to mind when one imagines a harsh winter habitat. But over the last few decades, ornithologists have recorded neotropical migrants overwintering there and in other southeastern states, rather than fleeing to Central or South America. In these cases, it's not so much seed that is in short

Sunday, October 30, 2011

LANDSCAPING & MAINTENANCE: Keeping Up The Yard Through The Winter


This is the time when people start to want to stay indoors a bit more, especially when the temperatures significantly drop.

The good news is that if you prepare ahead, you can save yourself time and money. Taking some good housekeeping steps now will allow you to step outside into the fresh spring air next year to a well-preserved outdoor space.


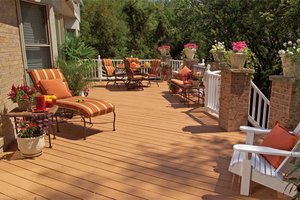
But you can't neglect your outdoor patios and decks, especially if you plan to sell soon. Buyers won't want to see broken-wood decks or corroded wrought iron patio sets in your backyard.
Where to begin? First, if your deck is looking a little worn and tired, make the necessary repairs now. Don't wait until you can stick your foot through a board (like I did). That's not only dangerous but it also mandates a quick fix.


Give your deck a good cleaning and sealing or staining before the weather gets too cold and wet to do this. Make sure you check for loose nails and get rid of any splintery edges by sanding them down. Seal with waterproofing sealants. For these, generally the weather has to be above 32 degrees F and 50 degrees F for sealing and stains, respectively, to work properly.


Put the clippers to work. Take a good look around your yard and decide which plants need to go. Many annuals may have been killed by frost and it's time to clear them away. Keep your flowers keep them looking good by trimming away dead leaves. If you cut your plants back now it will cause them to grow and flower more effectively later on.


Add seasonal plants. You can still have some nice color in your yard if you get the right plants for

Wednesday, July 20, 2011

Annual deck maintenance will forestall major repairs, protect your investment, and 

boost your enjoyment of your outdoor living space.

Because decks are exposed to the harshest elements, they require annual maintenance. Most decks should be cleaned and sealed every year to protect wood components; even decks made of composite or vinyl decking should be washed annually. Also, every deck should be checked regularly for signs of rot and to ensure structural integrity.


Because a deck is a particularly good investment—returning about 73% of its original cost, according to Remodeling Magazine’s annual Cost vs. Value Report—it’s a good idea to establish a routine of upkeep that’ll protect your deck and prevent expensive repairs. Here’s a simple maintenance schedule to help keep your deck safe, sound, and looking great.


Late spring: Wash the deck
Aside from general dinginess, one of the sure signs a deck needs washing is a film of mold and grunge. Left unchecked, mold and dirt and can trap moisture and cause rot.


Begin cleaning your deck by removing debris from between deck boards using a putty knife. (For a makeshift extension that’s a real knee-saver, try pushing the handle of your putty knife into a length of 1¼-inch PVC pipe. Some putty knives squeeze right in.)
Or, buy a pole-type groove and crevice cleaner. Pay special attention to the areas where deck boards cross the joists—the structural members underneath the decking. Thoroughly sweep the deck.


For a wood deck, use a standard deck cleaner—about $20 for 250 sq. ft. coverage. Or, make your own with a half bleach, half water solution. Choose a cloudy day when the decking is cool and the sun won’t evaporate the cleaner. Protect all shrubs and plantings with plastic sheeting. Apply the cleaner according to the manufacturer’s instructions.


Once the decking is cleaned, tackle the railing. Working from the bottom up, apply the cleaner, scrub, and then rinse. Working from the top down splatters the cleaning solution onto dry wood where it can double-bleach the surface, leaving marks that don’t go away when the lower area is washed. Working from the bottom up means you’ll be splattering onto a wet surface where the cleaner is diluted, leaving no marks.


For composite decks, use a cleaner specifically formulated for use on composite material. Scrub with a soft brush. Do not use a pressure washer—it can permanently damage the decking and will void any warranty. Remove rust and leaf stains with a deck brightener containing oxalic acid. Attack grease and oil stains with a commercial degreaser and detergents. Mold and mildew can be kept under control with the use of a deck wash solution twice a year.

Friday, April 29, 2011

LANDSCAPING & GARDENING: 3 Gardening mistakes to avoid

Gardening is not rocket science: If you can dig a hole, turn on a spigot, and snip a dead flower off a vine, you can tend a garden.


Still, gardeners need to make judgment calls. How much water does this shrub need? Will that tree get enough sun? Is this hole deep enough? It’s easy to misjudge and make a mess out of the landscaping. Here are common garden blunders.


1. Too many changes too soon. The excitement of warm spring weather often creates a passion for yard work. But what looks like a spring weed might be a fall-blooming vine. Encourage buyers to: Live with their land for a year and observe how many hours of sunlight each part of the garden gets. Test the pH of the soil to determine if acid- or alkaline-loving plants will be happy in that particular patch of heaven.


2. Too much togetherness. Trees and shrubs that look properly spaced when you plant them will crowd each other and compete for water, sun, and nutrients in a few years. Encourage buyers to: Read spacing instructions. Give trees plenty of space—they can always fill in later. Stagger bushes and plants and create two rows, which will create more breathing room. The results will look absurdly sparse at first. But live with it. In a few years, shrubs will fill empty spaces without suffocating each other.


3. Planting without a plan. Planting new garden beds without a long-term landscape plan is like pouring a house foundation without blueprints. Encourage buyers to: Draw a simple sketch of their yard—what’s there now and what they might add later, including patios and pools. Learn about the trees and shrubs that grow best in their soil and climate. A professional landscape designer can create a starter plan for as little as $250 to $500.


To download this article for your customers or access more landscaping ideas, visit HouseLogic.com and click on Landscaping under the Improve tab.


You can contact the staff of REALTOR® magazine by e-mail at narpubs@realtors.org

Thursday, April 28, 2011

MAINTANENCE & HOME REPAIR: 6 Worth-the-Price Fix-Ups

Simple and affordable do-it-yourself projects can greatly increase a home's resale value, according to HomeGain's annual home improvement and staging survey.
April 2011


The marketing company surveyed nearly 600 real estate professionals to discover which DIY home improvement projects give sellers the biggest return for their buck. Here are six projects under $1,000 (amounts are estimated) that made the list.


1. Cleaning and decluttering. Remove any personal items, unclutter countertops, organize closets and shelves, and make the home sparkling clean.
$290 Cost
$1,990 Return


2. Brightening. Clean all windows inside and out, replace old curtains, update lighting fixtures, and remove anything that blocks light from the windows.
$375 Cost
$1,550 Return


3. Smart staging. Rearrange furniture, bring in new accessories and furnishings to enhance rooms, incorporate artwork, and play soft music in the background.
$550 Cost
$2,194 Return


4. Landscaping enhancements. Punch up the home’s curb appeal in the front and back yards by adding bark mulch, bushes, and flowers and ensuring current plants and grass are well-cared for and manicured.
$540 Cost
$1,932 return


5. Repairing electrical or plumbing. Fix leaks under the sinks, remove any mildew stains, and ensure all plumbing is in good working condition. Update the home’s electrical with new wiring for modern appliances, fix any lights or outlets that don’t work, and replace old plug points with new safety fixtures.
$535 Cost
$1,505 Return


6. Replacing or shampooing dirty carpets. Steam-clean carpets, replace any worn carpets, and repair any floor creaks.
$647 Cost
$1,739 Return


Excerpted from HomeGain’s 2011 Home Sale Maximizer Survey, www.homesalemaximizer.com.
Realtor Magazine 4/2011

Monday, April 25, 2011

REPAIR AND MAINTANENCE: Looking to Spend a Tax Refund? Consider Outside Projects


It’s that time of the year—what to do with the tax refund?

For home owners who want to spend part of their checks on home sweet home, the possibilities seem endless.

New floors or kitchen cabinets? Windows or granite countertops? What gives you the most return on your investment?

The answer might surprise you—what’s on the outside counts the most right now.
The latest figures from local and national real estate groups indicate that the best investment for your home is related to curb appeal.
“An entry door, the front door to your house, will get you the most return for your money,” said Mike Cotrill, chief operating officer for the Greater Tulsa Association of REALTORS®.
Cotrill said figures from the “Cost vs. Value” report, conducted by the NATIONAL ASSOCIATION OF REALTORS® and Remodeling magazine, show that upgrading or replacing a front door is more than worth the money.
“They’ll get 102.1% of that cost recouped,” Cotrill said. “And locally in our region, it’s 116%. It’s all about curb appeal, that’s the entry point to your home.”
According to the report, which received data from Realtors in 80 cities, the “big-bang projects” include garage door replacement (83.9% payback), siding replacement (80%), kitchen remodels (72.8%), and outdoor deck additions (72.8%).
“It’s interesting that the top three are all about the outside of your home,” Cotrill said. “On a kitchen remodel this survey says you’ll get about 73% of your cost recouped, so you’re not going to get every dollar back. And these are all midrange averages.”
And outdoor projects continue to be appealing to potential buyers, he said.
“The backyard, decks, or outdoor entertainment areas are becoming more and more popular. If you get that spring fever, go outside and do some landscaping,” he said.
To read the full report, visit tulsaworld.com/costvsvaluereport.

Inside out

Other home owners are interested in projects that will add value and save energy.
Upgrading or repairing fundamental areas of the home will save money in the long run, said John Madden, Green Building Council Chair for the Homebuilders Association of Greater Tulsa.
“Having your HVAC (heating, ventilating, and air conditioning) serviced is the biggest thing,” he said. “It’s one of the most overlooked things that I think people should do every year, even on new houses. Your HVAC accounts for a massive amount of your electric bill.”

Sunday, April 10, 2011

That nasty winter North Jersey endured took a toll on more than lower backs sore from shoveling and budgets strained from all the snow removal—it also punished homes and property.


Drenching rains this month on top of the seemingly endless snow of December, January, and February only added to the damage.


“[I’ve had] hundreds of phone calls inquiring about water from ice dams [buildups] leaking into homes and shingles blown off by the high winds,” says veteran roofer Stan Reczkowski of SR Roofing in Paramus and Hillsdale. He added that this winter “rivals the winters of 1986-87 and 1995-96.”


So it’s time to put away the shovels, survey the damage, and get to work on spring fix-ups and cleanups.


Basements

Anyone with water in the basement has company.


“We have seen a dramatic increase in the number of calls from customers,” says Bob Lindsay, president of Weather-Tite Waterproofing in Saddle Brook.


“Home owners are seeking a permanent remedy so that they never have to deal with this type of situation again,” he says, adding that standard insurance policies often do not cover waterproofing.

Friday, March 25, 2011

GARDENING: Landscaping for Curb Appeal

A well-landscaped yard creates curb appeal and helps your property retain maximum value. Here are a few tips and tricks for sprucing up your outdoor spaces yourself.


beautiful yard is a head-turner, no doubt about it. The good news is that even if you can’t tell a tulip from a turnip at the garden center, you can still create eye-catching curb appeal by paying attention to the basics of good landscaping. Ignoring your yard—or doing something that’s out of character with the neighborhood—can jeopardize the assessed value of your home.


“We have several categories for design and appeal,“ says Frank Lucco, a real estate agent and professional appraiser in Houston. “That’s where we make those adjustments. Poorly maintained landscaping can be as much as a 5 or 10% deduction.”


Appraisers are quick to praise the allure of a well-tended lawn and good-looking landscaping when it comes time to sell your home, but most do not assign any specific increase in monetary value for upkeep.


“Landscaping is going to add to the appeal of the property and it may sell quicker, but it’s hard to determine value,” says John Bredemeyer, president of Omaha-based Realcorp. “You have to have a number to compensate someone if you drove into their tree and killed it, but is it really market value? Probably not.”


Nevertheless, most professionals agree that curb appeal and a well-maintained appearance prevent your property from losing value. Here are the top suggestions from real estate agents, appraisers, and landscape designers for boosting the curb appeal of your yard:


Green up the grass
If your house has a front yard, make sure it‘s neat and green. You don’t want bare spots, sprawling weeds, or an untrimmed appearance.


“It’s so simple to go to Home Depot, buy fertilizer, apply it every six weeks, and water it,” says Mitch Kalamian, a landscape designer in Huntinginton Beach, Calif. “It will green up.”


If the yard looks really scruffy, you may decide to invest in some sod. According to the National Gardening Association, the average cost of sod is 15 to 35 cents per sq. ft. If you hire a landscaper to sod your yard for you, labor will add 30% to 50% to the total cost of the project.


Another alternative is to plant low-maintenance turf grasses. Turf grasses are durable and drought-resistant. Expect to pay $18 to $30 for enough turf grass seed to plant 1,000 sq. ft. of lawn area.


Add colorful planting beds
Flower beds add color and help enliven otherwise plain areas, such as along driveways and the edges of walkways. In general, annual flowers are a bit cheaper but must be replaced every year. Perennials cost a bit more but come back annually and usually get larger or spread with each growing season.


If you’re not sure what to plant, inquire at your local garden center. Often, they’ll have a display of bedding plants chosen for their adaptability to your area. Also, they‘ll be inexpensive because they’re in season, says Peter Mezitt, president of Weston Nurseries in Hopkinton, Mass. Try pansies in the summer, and asters and mums in the fall to add vibrant color. “That’s what we do around the entrance to our garden center,” Mezitt says.


Valerie Torelli, a California REALTOR® who dresses up her clients’ yards to sell their houses faster and for more money, says that in her market, she can put in a bed of colorful annuals and bark, as well as cutting down overgrown shrubs, for less than $500. “We can buy gorgeous plants for $3.99 to $15.99,” she says.


Add landscape lighting
For homeowners who have made a sizeable investment in landscaping, it makes sense to think about adding another 10% to 15% to the bill for professional lighting. “You can’t see landscaping after dark,“ says Brandon Stephens, vice president of marketing for a landscape lighting firm in Lubbock, Texas, “and buyers are not always looking at houses on a Saturday afternoon.”


The cost of a system runs from $200 for a DIY installation to more than $4,000 for a professional job. If you‘re doing it on your own, the key is to light what you want people to see, such as mature trees and flowering shrubs.


Plant a tree
The value of mature trees is particularly difficult to determine. Lucco says that in his market, mature trees contribute as much as 10% of a $100,000 property’s overall value. In addition, a properly placed shade tree can shave as much as $32 a year on your energy bills. Expect to pay $50 to $100 for a young, 6- to 7-foot deciduous tree.


You can make your own initial assessment of the value of your property’s trees by visiting the National Tree Benefit Calculator. For example, a mature Southern red oak tree with a diameter of 36 inches in the front yard of a house in Augusta, Ga., would add $70 to the property value this year, according to the calculator

Pat Curry Published: March 25, 2010
Read more: http://www.houselogic.com/articles/landscaping-curb-appeal/#ixzz1GriJjCx7

Wednesday, March 23, 2011

BOSTON NEIGHBORHOODS: A 10-year plan for City Hall Plaza

New incremental approach starts with remodeled T station, trees,


The transformation of Boston’s City Hall Plaza is supposed to take shape before you even know it’s happening.


Next year, the plaza’s bunker-like subway station will be replaced with a sleek glass structure. Then, trees will start to appear along Cambridge Street and in the plaza itself. Eventually, they will frame a new amphitheater for concerts, theater performances, and special events.


Within 10 years, the nine-acre plaza will scarcely resemble the barren expanse of red brick so many Bostonians have come to detest.


That’s the new strategy being pursued by city planners, who said they are finished with grandiose, all-in-one plans to revitalize the plaza. No longer will they entertain sweeping proposals for a baseball diamond, fountains, vegetable gardens, or a grand hotel and retail complex — all actual ideas from the past. A slower, step-by-step approach, they said, is the only way to fix a dysfunctional civic space that has rejected decades of efforts to improve it.


“The problem with all the previous proposals is that they all tried to fix the plaza with one big idea,’’ said Kairos Shen, chief planner with the Boston Redevelopment Authority. “This approach will allow us to gradually make changes over time that will create something really transformative.’’


The specific plans are being generated in meetings hosted by Utile Inc., a Boston architectural firm that won a $54,000 grant from the Environmental Protection Agency to redesign the plaza to be greener, and with more usable public space. The next meeting is planned for early next month, though a date has not been set.


So far, the work has produced a pair of rough designs, each organized around the concept of adding bands of trees to create shade and smaller, more intimate gathering spaces.


“The idea is to give the plaza structure and create different scales of experience,’’ said Tim Love, a principal of Utile. “An important question to ask here is, ‘What can this space do well that doesn’t work on Boston Common or the [Rose Fitzgerald Kennedy] Greenway?’ ’’


For much of the year, the plaza is a dead zone between the two, with only occasional festivals and annual visits by the Big Apple Circus.


In his research, Love found some early designs that resemble the current proposal. A 1961 plan by I.M. Pei & Partners called for a lawn with a series of pathways through the plaza. An earlier effort called for a much wider, more gradual staircase rising from Faneuil Hall to the plaza.


A key aspect of the current design calls for smoothing out the slope between Cambridge and Congress streets, where visitors encounter multiple sets of stairs that make the plaza harder to traverse and close off spaces that could be used for cafe tables or small events.


Utile is developing the plan with the landscape architecture firm Reed Hilderbrand, a Watertown company that has worked on designs for the Greenway, the Arnold Arboretum, and the Christian Science Plaza.


“We don’t envision creating a garden here. The plaza still has to be urban,’’ said Eric Kramer, a senior associate with the firm. “But we have to find ways to make the pervasive paved surface more accessible in a way that can still manage crowds and allow trees to thrive.’’